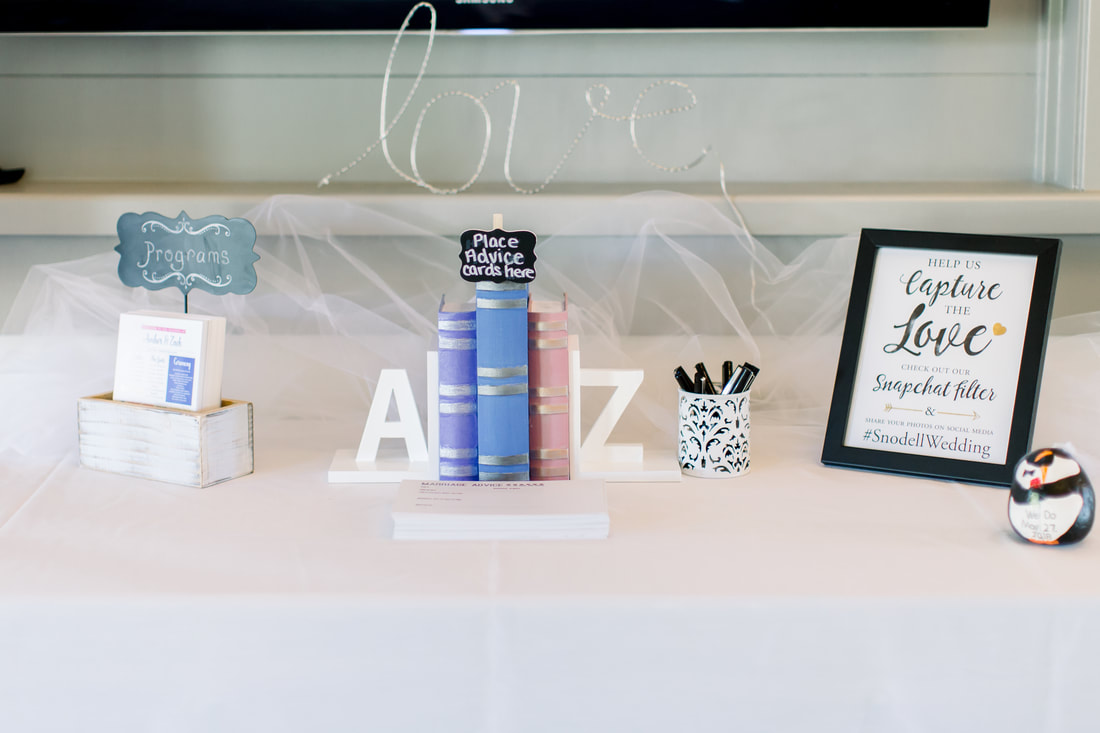
 One of my friends gave me bookends for Christmas. There was an A one and a Z one, for Amber and Zach (my now husband). Because our website played on the A & Z theme, I wanted to incorporate these bookends into our wedding decor. Plus, I am a huge fan of utilizing wedding decor around my home, or my home decor in my wedding. Here is how I made the card-box. To start, I bought Paper Mache books from Joann's Fabric. I bought two of the smaller size and one of the larger size (be sure to check here for a 20% off your order or 50% off one item coupon). They did not have 3 larger ones available, or I would have used those, since they are the same price and it would have created a bigger box to hold the 4x6 advice cards I planned to have with them. I then looked all over pinterest for ideas on how to decorate these book. The ideas ranged from paint, to fabric, to scrapbook paper. (Also, just type in paper mache book ideas in Pinterest and there are SOOO many things that can be done with these books.) I ended up deciding to paint them. I used Americana paint from Michael's for these books. I generally use it for everything, since it's $1.19 for a 2 ounce jar. At first I wanted to incorperate my weddings bright colors, so I painted them pink, blue, and yellow. After that was complete, I realized they looked kind of childish, so I repainted them, going for a more antique look the second time with dusty rose and frosted plum colors.  I used metallic paint on the binding. For the purple book, I used a pearl color. For the blue, I used silver with some black. For the pink I added some rose gold. I painted the pages white, with a tiny bit of yellow mixed into the white to look "older" (save some of this white paint after you cut your hole on the top). Then for the pages I took a large dry brush, dipped it slightly into the gray, and lightly painted the white to leave some lines to look like pages. Using an x-acto knife, I cut a hole in the middle of the large book as a hole for the cards. Make sure this hole is larger (I did .25 inch larger) than the card that is meant to be put in it. Then use the rest of your whitish paint to paint the cardboard that is showing through the hole. I then took my x-acto knife and cut a hole in the small books, lined that hole up with the the back of the large book and cut the same sized hole in each of the long books. I wanted them to look like they were pressed back to a shelf, so I lined up the back part of them, meaning that their bindings were not in a line with each other.
Last, I used some hot glue to glue the books together. I also glued all but one book (the large book) closed. That open book I used as the opening to take all the cards out of the box (they had to get emptied once before the wedding as guest were arriving, as not all advice cards fit). The opening between the books was large enough for a card to fit theoretically, but they did not go through easily, so most of the time go stuck. I would recommend getting the three large books to have a better card box.
Overall, I think they turned out well. They were cute for our A to Z theme or for a library themed wedding or party. The books can be decorated so many ways, so it'll be easy to incorporate them into every theme.
0 Comments
Leave a Reply. |


